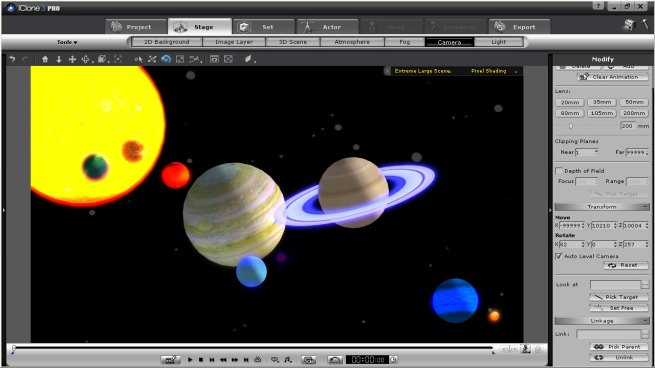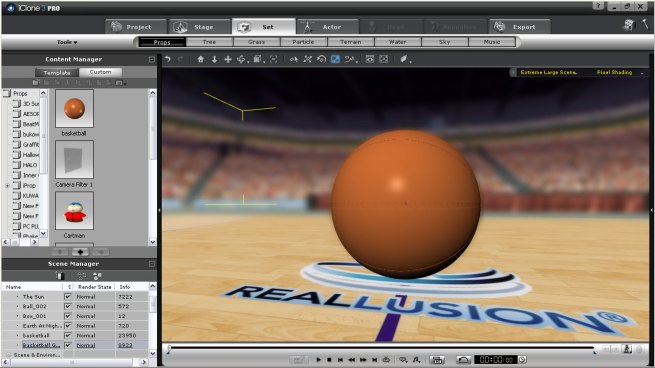
Display 3D Scene with perfect camera orbit animation every time, no matter the size or scope of your project
What up iCloners, today’s tip makes the world go round. Seriously. I am talking about orbit and how you can, Produce a Perfect Orbit Camera in iClone3.1. You can easily showcase and create epic long shots inside of 3D Scenes large or small with this technique and all you really have to do is choose a subject or object to focus on and then build the scene around it and then use this tip to create your Perfect Orbit Camera.

Display more than just 3D scene, create Perfect Orbit Cameras to help brand products and services
For product display, nothing beats this method. It will give you a seamless result every time you wish to use this technique without question, and it’s extremely easy to execute. So, why 3 objects? Here’s how it breaks down, you have your subject which you want the custom camera to rotate around 360 degrees, so this is Object 01, then, you have a dummy object that will be placed inside the subject and actually rotated 359 degrees on the Z axis to Link your custom Helper object. The animated rotating 3D Block will be your Object 02. Then another 3D Block will be placed in the scene and a custom camera will be added and linked to this the 3rd object or Object 03 and it will be also known as our Helper object. The reason for this third prop is for the camera to have a node to link to first, but second, it is also there to help control additional camera angles and movement. Follow the steps below to create your own Perfect Orbit Camera animaiton in iClone 3.1 or watch the high-speed video example provided at the bottom of this post.
- Go to the Set tab
- Click the Props button
- Click the Template tab
- Locate and select the 3D Blocks folder
- Double Click the Ball_002 3D Block to add it to the scene, this will be Object 02
- Select the Time Setting Panel button
- Set an Animation Length to a total of 2000 frames, is it is not set as such already for a 30 second rotation
- Hit Hotkey: F3 to open the Timeline
- Set a value of 999 into the Current Frame field to place the time 1 frame before the middle of the project
- Make sure your Ball_002 is selected, in the Modify Panel set a value of 179 in the Rotate z Axis field
- Click the End button to move to frame 2000
- Set a value of 359 in the Rotate z Axis field, the values 179 and 359 ensure that the rotate will occur properly
- Click Play to review the rotation or scrub the Timeline to see the bounding box and the rotation better
- In the 3D Blocks folder, Double Click the Box_001 3D Block to add it to the scene, this will be Object 03 or the Helper object
- Use the Move and Scale tools to position the Box_001 3D Block away from Object 02 and scale it down a bit
- Right Click the Box_001 prop and select Link – Link To
- Click the Ball_002 prop to link the Box to the Ball, notice a bounding box will flash to indicate a successful link
- Click Play to review the rotation, notice the Box will now Orbit around the Ball
- Load your Custom Prop or subject you wish to create Perfect Camera Orbit around, this will be known as Object 01 ( for this example I use a Globe and Basketball prop to showcase a Scene and a Product )
- Click the Preview Camera shader from the top right of the view port
- Select the Add button in the Modify Panel to add a custom camera to the scene
- Under the Linkage portion of the menu, click the Pick Parent button
- Click the Box_002 prop to Link the camera to the Helper Object or Object 02, notice a bounding box will flash to indicate a successful link
- Select the Link to Sub Node icon
- Check the Align Position to Parent option
- In the custom camera Modify Panel, locate the Look At portion of the Menu, click Pick Target
- Select the Custom Prop or Object 01 that you want the Perfect Orbit Camera to focus on
- Click Play to review the Perfect Camera Orbit
- In the Scene Manager click Box_001 and then in the Modify Panel, locate the Display portion of the menu and click the Off button
- Use the Move tool to edit the position of the Helper Object or Box_001 to change the Camera Angles before, during or at the end of the Perfect Camera Orbit if you wish
Perfect Camera Orbits can assit you no matter if you are selling basketballs or shooting solar systems. They will help to ensure you have that clean and smooth shot that you want to switch to from time to time. For long, slow, dramatic style shots a high angle Orbit Camera is perfect and using the Helper Object to dictate that type of scenario is a easy and highly effective way to produce that custom camera. I used to run into the problem of trying to create a smooth rotation and it would rotate half way around and then rotate back the way it came for the second half of my attempt. I lost more than a few hairs getting it right, but with this method you are sure to knock it out the right way, the very first time. I can promise you that. For a more in depth look into cameras and the basic functionallity they have in your version of iClone, visit the Online Beta Index camera section for yourself to learn more. Below you will find a high-speed build of this method and how you too can use any 3 objects to recreate this in your projects, but I have also included 2 rendered examples of both a 3D Scene and 3D object created with the same project and the same Perfect Camera Orbit. Enjoy!
Hi James!
If it’s not too much trouble, I’ve got a question about the preset camera orbits ie. circle and dolly. I’m never able to use them because the animation is always centered around the “world” origin. Is there a way to reset the origin of the animation to your actual target maybe using a helper as well? Thanks. 🙂
Hey aT,
Never too much trouble and thanks for sending a reader to the new AML tool. I am moving from Florida to Colorado this week so I things have been pretty quiet here and I haven’t had a chance to update users on some of the cool new stuff out there such as the AML creator. But, to answer your question, YES, by all means use a “dummy” object that can be anything that has a node set to 0,0,0 (centered) and then just animate its rotation say maybe inside your subject, (or just set the object to invisible before rendering) and Link your camera to the dummy. Works every time. Hope this helps.
Hey James,
Are you done unpacking yet? I’m itching for more divine wisdom! 🙂
Hey James – just want to check if this was mistyped or I’m just confused. Should this step:
Click the Box_002 prop to Link the camera to the Helper Object or Object 02, notice a bounding box will flash to indicate a successful link
be instead “Box_001” and “Object 3”? I tried linking to the ball, but it didn’t quite work right. 🙂
Also got a second question – when I load my custom prop, (object 1) does it too have to be at the origin and at the beginning of the timeline for the rotation of the ball (object 2) to work? Is the only way around that then is to make the rotation a perform command and merge your ball (object 2) to another (invisible) helper object placed in the vicinity of your target object? (much like a wheel helper?). 😦
Hey aT,
Thanks for the question and to answer your first question, the move went smoothly and all bubble-wrap is safely stored 🙂 Now, down to business, no it’s not a misprint but, allow me elaborate a bit on the technique. So let’s say you have an object that you want to do a perfect 360 rotation around that is not in the center (0,0,0) of the project. This is how you achieve it, place an object inside the subject. But make sure this is executed at frame 0 so the first keyframe in the scene in relation to the rotation object will refer to it’s placement as absolute center or (0,0,0) then apply the rest of the technique as you see it in the tip and you should have no issues. But as always, let me know if you do. Also, review the video again closely with the Annotations turned off and watch where I click to catch any small changes or slight revisions I include in my process. That should do it for you my friend and stay tuned for more real-time tips and tricks.
Thanks James. I did figure out my problem – there was some offset that crept into the ball helper that made it jump when it started it’s rotation.
If the statement I referred to above is correct, should I interpret it as meaning that I could link the camera to box_001 OR ball_002 and it would work either way? There are two different statements –
Then another 3D Block will be placed in the scene and a custom camera will be added and linked to this the 3rd object or Object 03 and it will be also known as our Helper object.
and
Click the Box_002 prop to Link the camera to the Helper Object or Object 02, notice a bounding box will flash to indicate a successful link
In any case, I got it to work. I also did collect the clip to make a perform command because I needed to use it in the middle of a project so starting at frame 0 wouldn’t work. Thanks again!